Friday 28 February 2014

Indian Style Chilli Chicken .....!!!!


Immediately after our marriage, we were in Kolkata for a very short period of time. But I think  it was one of the most beautiful periods of my life. During that time we had no such responsibilities...life was too easy to spend  and we enjoyed each n every moment of it. We loved to roam here and there around the city on weekends. 
There were few chinese restaurants  near our home. Among them there was one from which  most of the time we used to order our dinner .Though it was not a very popular or famous restaurant but the food was very good. I still miss their chilli chicken preparation. Then after couple of  months  we left Kolkata and since then I still didn't get any chance to go to that restaurant again . But I remember their delicious Indo Chinese Preparations. I wish I could rewind time or  just get an option to enjoy their special chilli chicken .LOL...

Anyway, here is my version of chili chicken recipe which I prepare very often at home. As gravy chili chicken is our favorite I don't go for the dry version and prepare this with little gravy all the time. The process is not at all time taking or difficult. A very quick and easy process which goes very well with roti , paratha, chowmien or fried rice.

Here is the entire process:

Ingredients:


  • Boneless/Mixed Boned Chicken: 250 gm ( cut in small cubes)
  • Onion: 2 Large (Diced)
  • Ginger: 1 " ( Grated)
  • Capsicum: 2 Large( Diced)
  • Garlic: 12/15 cloves( Crushed)
  • Black Pepper Powder: 1/2 tsp.
  • Black Soy Sauce: 2 tbsp.
  • Tomato Sauce: 1 Tbsp.
  • Red Chili Sauce: 1 tsp.
  • Vinegar:2 tsp.
  • Cornflour : 2 tbsp.
  • Salt:As per taste ( Be careful about the salt as soy sauce itself has salt in it).
  • Spring Onion: 1/4 cup (chopped)
  • Green Chilli: 2/4 (chopped)
  • White Oil: 2 tbsp
  • Water/Chicken Stock: 1 cup.


Process:


  • Wash and pat dry the chicken pieces first. Marinate them with black pepper powder, half of the crushed garlic,grated ginger, 1 tbsp soy sauce ,vinegar ,corn flour and little salt . Mix thoroughly and keep it for 30 minutes to 1 hour preferably inside the refrigerator.
  • Then heat the oil in a pan and fry the marinated chicken pieces till golden brown. Keep them on a tissue paper to absorb the extra oil.
  • But don't discard the remnants of the marinade.
  • Now discard the rest of the oil from the pan and heat the fresh oil (you may prepare it with the remaining oil too.)
  • Add the diced onion, capsicum, garlic and saute for few minutes.
  • Just after few minutes when the onions becomes translucent and the capsicum become soft  add salt( I am writing once again,be careful while adding salt as soy sauce itself has salt), rest of the black soy sauce, tomato sauce and red chilli sauce.
  • Cook for 4/5 minutes and  add the fried chicken pieces and the remnants of the marinade.
  • Cook 2/3 minutes and then pour the water or the chicken stock,whatever you are using.
  • Cover and cook another 5/6 minutes. Adjust the gravy by increasing the flame according to your choice. Taste the seasoning. If required add little more salt.
  • Finally add the chopped spring onion and green chilli . Give a quick stir and turn off the flame.
  • Serve hot with fried rice, chow mein, roti or paratha.


                          Enjoy Your Food...!!!!

Tuesday 25 February 2014

Masala Bhindi In Punjabi Style....!!!!


Bhindi or Okra is one of my most favorite vegetables. Whenever I go to the farmer's market I buy fresh green bhindi and always store it inside the fridge so that whenever I have to prepare something very quickly I could select this vegetable. It tastes best when served with soft chapati or roti. Not only that you may also enjoy it with rice also.
 I learned this recipe from one of my Punjabi friend. Though I did few variations but I must say once you try this you will repeat this again and again. 

The process is very simple and less time consuming.

Here is the entire process:

Ingredients:


  • Bhindi/Okra:1/2 kg ( 500 gm)
  • Onion: 2 Large ( Finely Chopped)
  • Ginger:1 tsp Paste
  • Garlic:3/4 cloves (crushed, optional though)
  • Tomato:2 (finely chopped)
  • Green Chilli : 2/3 (chopped) (optional)
  • Turmeric Powder:1 tsp.
  • Red Chili Powder:1/2 tsp (adjust according to your taste)
  • Coriander Powder:11/2 tsp.
  • Amchur Powder/Chat Masala Powder:1 tsp.
  • Garam Masala Powder:1/2 tsp.
  • Kasoori Methi :1/2 tsp.
  • Cumin Seeds:1 tsp.
  • White /Mustard Oil:2-3 tbsp.
  • Salt:As per Taste.
  • Sugar:1/4 tsp.


Process:


  • At first wash and pat dry the bhindi and trim the both ends and then cut into 1" pieces.
  • Then heat 1 tbsp of oil in a cooking pan and add the bhindi and saute them in low to mediun heat for few minutes (10-12 minutes). Don't over fry them.Keep them aside.
  • Now in the same pan add the rest of the oil and add the whole cumin seeds and let them sputter.
  • Once they start to sputter add the chopped onion and the chopped green chilli.Cook it for 5/6 minutes or until the onions become translucent.
  • Now add the chopped tomato and cook for few minutes until the tomatoes become little mushy.
  • Add the ginger garlic paste and mix very well .
  • Then add turmeric powder, salt, sugar, red chili powder, amchur or chat masala powder, coriander powder and kasuri methi. Mix thoroughly. Cook until the smell of the raw spices goes off. It will take 4-5 minutes. 
  • Now add the previously sauted bhindi or okra and mix with all the spices very well. *****Cover and cook until the oil start to release from sides. Stir in between.
  • Uncover after 8-10 minutes. Taste the seasoning. Add more salt or sugar if required. Cook another 3/4 muntes uncovered.
  • Sprinkle garam masala powder ,cover for a minute and turn off the flame.
  • Serve with roti or chapati.


****Tip: Making bhindi uncovered gives it the Bestest taste. So,nowadays  I don't cover during cooking this dish . Try it and see the difference...! 


                                                              Enjoy Your Food...!

Wednesday 19 February 2014

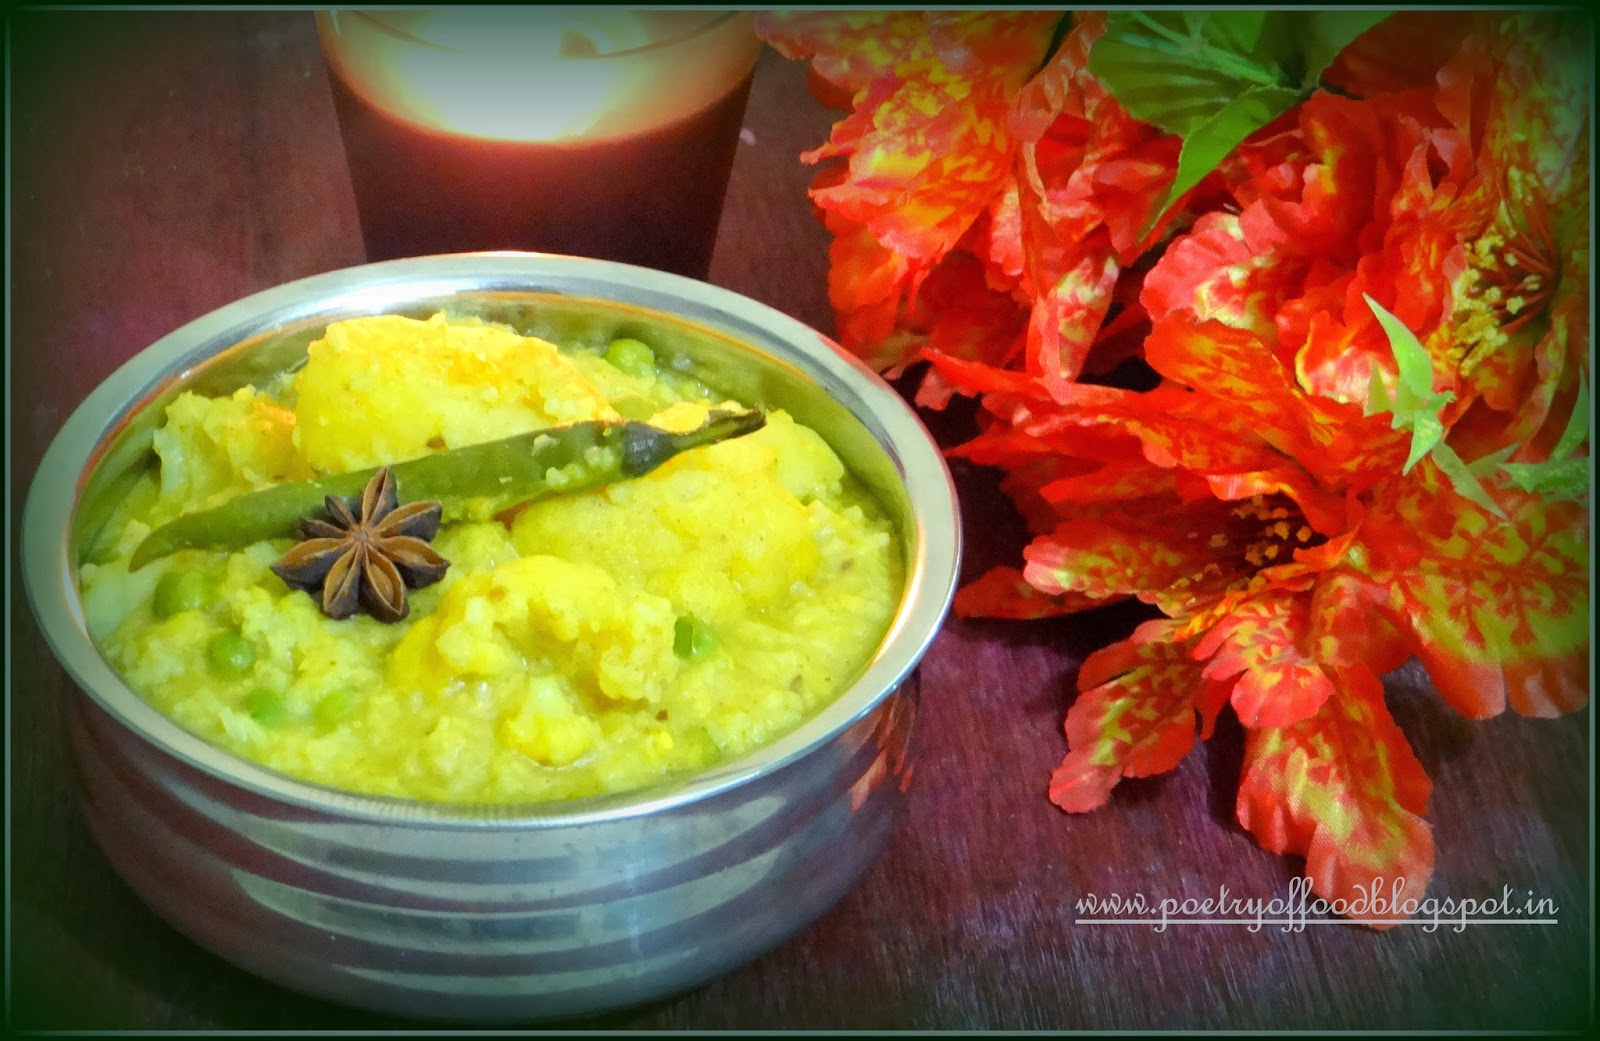
Niramish Bhoger Khichuri.... Veg Khidchdi.... In Maa's Way...!!


Friday is considered to be a complete veg day at my home. I cook everything without even onion and garlic. And Naturally always it becomes too hard to me to decide what to cook on that day,so that the other two members eat without complaining. So, most of the Fridays I opt for Veg Khichuri (Khichdi) with loads of vegetables . This is not only easy to cook but also it's very filling, time saving and healthy too. Moreover my daughter and hubby love this too.
But before I start to write the recipe I should mention that this Niramish Khichuri is also called "Bhoger Khicuri" in Bengali because during puja (specially during Durga and Lakshmi Puja) we offer this to the Goddess with other fries and chutney and at the end of the Puja, it is distributed among all the devotee as "Prasad". So, it has an another exclusive importance in our life.

But it's a very simple and easy recipe and Maa used to cook this in a one step process. Following her process I also prepare it and it is really delicious.


Here is the recipe :

Ingredients:


  • Gobindobhog Rice ( Amber more Rice):3/4th Cup
  • Mung Daal( Golden Gram Lentil):3/4th Cup
  • Green Peas:1/4th Cup (fresh or frozen)
  • Potato:2 Large (cut into halves or quarters)
  • Cauliflower:1 Cup florets ( If you don't have, skip that)
  • Ginger Paste: 11/2 tsp.
  • Cumin Paste or Powder:1 tsp.
  • Cumin Seeds: 1 tsp.
  • Bay Leaves: 2
  • Green Chili/Red Dry Chili:2/3.
  • Turmeric Powder:1 tsp.
  • Red Chili Powder:1 tsp. ( Though I don't use generally because of my daughter)
  • Whole Garam Masala :1 Cinnamon Stick,2/3 Cloves and 2/3 Green Cardamoms.
  • Salt:As Per Taste.
  • Sugar:1/4th tsp.
  • Garam Masala Powder:1/2 tsp.
  • Water:3/4 Cups.
  • Mustard Oil :2 tbsp.
  • Ghee:1/2 tbsp.
You may add any other vegetables of your choice.


Process:

  • Wash and soak the rice and the golden gram dal separately in water for 30 minutes to 1 hour.
  • Heat oil in a deep bottomed vessel or in a pressure cooker and add the bay leaves and cumin seeds for tempering.
  • Once the Cumin seeds start to splutter add the cinnamon stick, cloves , green cardamoms and the green/red dry chili.
  • Once the beautiful aroma of the whole garam masala start to come out add the halved potatoes and the cauliflower florets. Add the salt and turmeric powder. Fry until these are little fried.
  • Now add the soaked mung dal. Stir it very well.But be very careful so that it can't be burnt.
  • After 2/3 minutes add the govindobhog rice and mix it thoroughly.
  • Now add the ginger paste, cumin paste and the red chili powder.Stir continuously on medium flame. Once the raw smell of the spices goes off add salt and give a quick stir. Then pour the water and cover the vessel.
  • Increase the flame little and cook until the rice ,lentils and other vegetables are almost done.
  • Uncover and add the green peas.Cover and cook again until all the ingredients are mixed with each other properly and it has become mushy.
  • Uncover and add little sugar . Cook for few minutes and taste the seasoning. Add more salt if required.
  • Sprinkle the garam masala powder and turn off the flame.
  • Niramish Bhoger Khichuri or Veg Khichdi is now ready to serve.
  • Pour ghee on the top and enjoy.


Tip: To give it a twist and beautiful flavour sprinkle dry roasted cumin powder and finely chopped coconut.

                             Enjoy Your Food..!


Monday 17 February 2014

Palak Aanda....Dim Palong ... Egg Spinach Curry...!!!!


Spinach,a leafy green vegetable, are among the most nutritious of low calorie foods. It is an incredible immune system booster that can protect you against myriad health problems throughout your life.
But to be very frank I don't like its taste so much.So,since few days I was looking for a good recipe which will help me and my family to eat spinach.

 It's none other than the most gorgeous ,"Devalina didi" (Devalina Sen,a renowned doctor by profession) posted a very interesting recipe of spinach and egg curry and I followed the same with few variations and it turned out really good.My heart core thanks to her. Not only it has become my favorite recipe but also my family members liked it very much.

Here is the recipe:

Ingredients:

  • Spinach:2 bunches(chopped)
  • Eggs:4(hard boiled)
  • Onion:2 medium(smoothly chopped)
  • Tomato:2(chopped)
  • Ginger Paste:1 tsp
  • Garlic:3-4 cloves (crushed)
  • Cumin powder :1 tsp
  • Red chili powder :1 tsp
  • Turmeric powder:1/4 tsp
  • Whole Garam Masala: 1 Cinnamon Stick, 2/3 green cardamoms and 2/3 cloves.
  • Sugar:1/2 tsp
  • Salt as per taste
  • Oil: 2 tbsp
  • 1/2 cup cashew paste
  • Water: 1/2 Cup (warm)
  • Fresh cream:2 tbsp.(Optional)

Process:


  • Boil the eggs and peel them off .Fry them with little oil and turmeric powder until golden.Set them aside.
  • Wash and chop the spinach and strain the excess water.
  • Soak cashew nuts in warm milk for 15 minutes and make a smooth paste of it.
  • Now in your  kodhai/wok heat oil and  add whole garam masala(1 cinnamon stick,2 cardamons and 2-3 cloves). Once you feel the aroma add the sugar and fry it till little brown.
  • Add the crushed garlic and fry it slightly .
  • Now add the chopped tomato and sprinkle little salt. Soon the tomato will be mushy and pulpy.
  • Then add the chopped onion and cook until it becomes translucent.
  • Add cumin powder, turmeric powder, red chili powder, and salt.Then add the ginger paste. Mix thoroughly.
  • Cook very well until the oil separates from the spices.
  • Then add the chopped spinach. As the spinach will release a lot of water it will be cooked in its own water. But I added 1/2 cup of warm water .
  • Cook covered until the spinach becomes very mushy .
  • Now uncover the wok and add the cashew paste. Give a very good stir.
  • Now prick the boiled eggs with a fork and add them into the spinach gravy.
  •  Cook the gravy in medium flame for 4/5 minutes.
  • Increase the flame little and adjust the gravy according to your choice. Don't forget to check the seasoning. If required add salt and sugar.
  • Add the fresh cream(though I didn't add)
  • Now your Palak Aanda is ready to serve.
  • Serve it with Paratha, roti or puri. It tastes heavenly.


                   Enjoy Your Food...!!!

Friday 14 February 2014

Frosted Chocolate Buttermilk Cake...! Happy Valentine's Day to All My Dearest Blog Readers...!


There was a time in my life when I didn't have any idea about this Valentine day. First time, most probably when I was in 10th standard one of my friends told me about it. But I didn't understand properly. After returning home I searched the dictionary and got a very faint idea about the Saint Valentine's Day. Nowadays even my 5 year old daughter knows about it. But anyway, Love is the most wonderful feelings of the world which should be expressed in a special way. 14th February is observed to be celebrated as the Valentine's Day or Saint Valentine's Day or The Feast Of the Valentine. All over the world people celebrate this day in various exclusive ways. Day by day the craziness regarding the day is just increasing tremendously. But to be very honest I don't believe that any particular day is required or essential  to celebrate my love. I think you can make your everyday or even every moment very special for your beloved one. Moreover I don't think that Valentine's day should be entirely related to the "couples" only. We can show our affection to all whom we love, be it our partner, be it our best friends, be it our parents or even children.


Anyway, not exactly because of celebrating this Valentine's day but just to see the smiling face of my little one and also to pamper my baking addiction, I made these frosted chocolate-buttermilk cakes yesterday. I chose chocolate flavor as it is her most favorite

Here is the entire process.

Ingredients:

For the Cake:


  • All Purpose Flour:3/4th Cup
  • Sugar:3/4th Cup
  • Cocoa Powder:6 tbsp( Preferably Dutch Process)
  • Hot Water:4/5 tbsp.
  • Baking Powder:1 tsp.
  • Baking Soda:1/2 tsp.
  • Salt:1/4 tsp.
  • Unsalted Butter:3 tbsp (melted)
  • Buttermilk:6 tbsp.
  • Egg:1 large egg
  • Egg White:white of 1 large egg.


 For Icing( Buttercream):


  • Unsalted Butter:1/2 cup (keep at room temperature)
  • Icing Sugar:1 Cup
  • Vanilla Extract:1/2 tsp.

Process:


  • Preheat the oven in 170-180 degree C .Place the cup ckae liners into your cup cake baking tray.
  • In a large mixing bowl mix the flour,sugar,baking powder,baking soda and salt.Set it aside.
  • With an electric mixer mix the cocoa powder with the hot water and beat until a thick smooth paste is formed. It may require little more hot water. Mixing the cocoa powder with hot water will intensify the chocolate flavour.
  • Now into this chocolate paste add the butter,buttermilk,egg and egg white. Beat until combined.
  • Then Whisk in flour mixture till a smooth batter is prepared. You may use a electric mixer for this. But whaterver you use do not over beat it. Mix until smooth and no lump is present in the mixture.
  • Pour the batter into the cupcake liners and bake in the preheated oven for 15-20 mins or until risen ,firm and a inserted toothpick into the cakes comes out clean.
  • Now take these out of the oven and let it cool for sometime.

For the Buttercream :


  • For the buttercream beat together the butter,icing sugar and vanilla extract until smooth.You may add any food color of your choice to the frosting.
  • Spread or pipe a little of the buttercream on the top of the each cupcake.
  • To make it more special ,make different shapes with fondant or buttersugar paste and decorate your cupcakes.You may use different edible colored sprinkles too.

For the Heart Shaped Cake:


  • With the same batter, using a heart shaped mould I made an another cake. For this cake I baked it in the preheated oven for 20 - 25 mins. and decorated it with the same icing and fondant.


          Enjoy Exclusively With Your Valentine...!

Tuesday 11 February 2014

Dhaba Mutton Curry...!! Mutton Curry Usually Prepared in the Small Restaurants Beside Highways In India...!


Few days ago on a Sunday, waking up little early in the morning , me and my husband decided to go for a long drive . It's one of our most favourite hobbies. It not only gives us a break from the regular routine life but also we love to enjoy our foods in the small restaurants( dhaba) besides the highways. That day while we were going through the Bombay Nasik highway  we entered inside a Punjabi Dhaba and my hubby ordered one of their special Mutton Preparations. Though I don't eat mutton but my husband was constantly insisting me to taste that mutton curry little  as it was out of the world according to him. I just tasted the gravy and honestly it was so good that I cant explain.  
Since that moment my cooking experiment habit was haunting me and I wanted to prepare that mutton curry at home. But I couldn't understand how did they make it. So , I was searching for an authentic dhaba style mutton curry recipe everywhere. Even I bought two books for this. I searched in the internet also. Not only mutton recipes I read few lamb recipes also.Then I decided to write down the whole process in my own way, combining all the recipes I collected from here n there. To be very honest,reading loads of recipes gave me a clear idea of usual dhaba style mutton curry and found that almost all the recipes are more or less similar.
Anyway, I took the chance of experimenting and prepared Dhaba Mutton Curry in my own way. I didn't know that it would be appreciated so much by my mutton lover hubby and even my daughter liked it very much. 

So here goes the recipe :

Ingredients:

  • Mutton/Lamb: 500 gm (I used Curry cut pieces)
  • Onion: 2 Large (Chopped)
  • Garlic: 1/2 bulb of a whole garlic ( crushed)
  • Ginger:2'' Ginger( Paste)
  • Red Chili Powder: 1 tsp (adjust according to your taste,though I didn't use at all)
  • Kashmiri Chili Powder: 1 tsp.
  • Salt: To Taste
  • Sugar: 1/4 tsp.
  • Turmeric Powder: 1 tsp.
  • Cumin Powder:1/2 tsp.
  • Coriander Powder:1/2 tsp.
  • Cinnamon Stick: 1'' 
  • Cloves: 4
  • Cardamoms:3/4
  • Bay Leaves:1/2
  • Tomato Puree:2/3 tbsp.
  • Water: 2 Cups
  • Ghee(Clarified Butter):1/2 Cup( you may replace it with mustard oil too)
  • Green Chili: 2/3 (Chopped)


Process:


  • At first take the pressure cooker or any another heavy bottomed vessel. Pour 2 tbsp of ghee and heat it.
  • Add the pieces of the mutton and fry them on medium flame till brown. Once it is done, take them out and keep separately.
  • Now add the rest of the ghee and increase the temperature slightly. Add the bay leaves , cinnamon sticks, cloves and the cardamoms.
  • Feel the beautiful fragrance and add the chopped onions. Decrease the flame and fry the onions till translucent.
  • Add garlic, ginger paste and the chopped green chili(I didn't use green chili because of my daughter).Saute them for 2 minutes.
  • Meanwhile make a paste of turmeric powder,kashmiri red chili powder, coriander and cumin powder with little water.
  • Pour the paste into the vessel and mix well.Add salt and cook it for few minutes until oil starts to release from sides.
  • Pour the water into it and bring it to boil.
  • Add the fried mutton pieces , lower the heat to minimum ,cover it and simmer it for 1 hour.
  • After 1 hour remove the cover and add the sugar and tomato puree (remember, do not add the tomato puree, before the mutton is well cooked else the mutton will be chewy.
  • Mix very well.Increase the temperature to medium and cook uncover for more 5/6 minutes.
  • Check the seasoning and adjust the salt. You may adjust the gravy also according to your choice.
  • Transfer the curry into a serving bowl and serve with chapati, roti naan or with steamed rice.


                          Enjoy Your Food...!